How to upload & size your logo
This is one of the topics that is asked often when setting up a new theme. Every theme seems to have a different sized logo area and simply loading in your logo file isn’t going to work. It takes a little bit of prepping before loading your logo to a new theme. If not sized right, it won’t look it’s best. In this quick tutorial we will use the free version of PicMonkey.com to properly size a logo before loading it. If after reading through this you are still having trouble, please contact me.
Lets Get Started
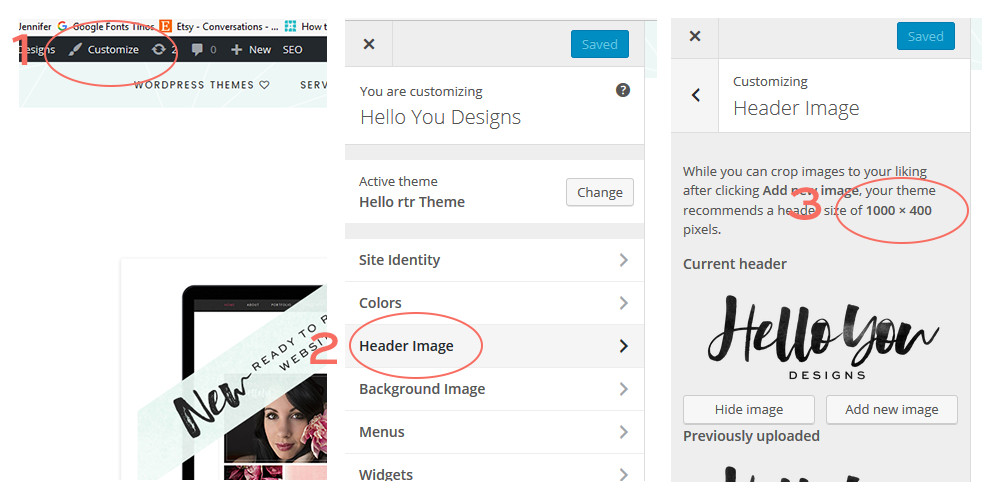
Find Your Logo/Header Size
STEP 1: Log in to your WordPress dashboard and view the homepage of the site. In the top left corner is the Customize option. Click that.
STEP 2: Select “Header Image” from the menu.
STEP 3: At the end of the description will be what we will call the “canvas size”. For this tutorial I’ll be using the Hello Darling size of 1000×400.
Create the Canvas
Open a new tab or window and go to PicMonkey.com
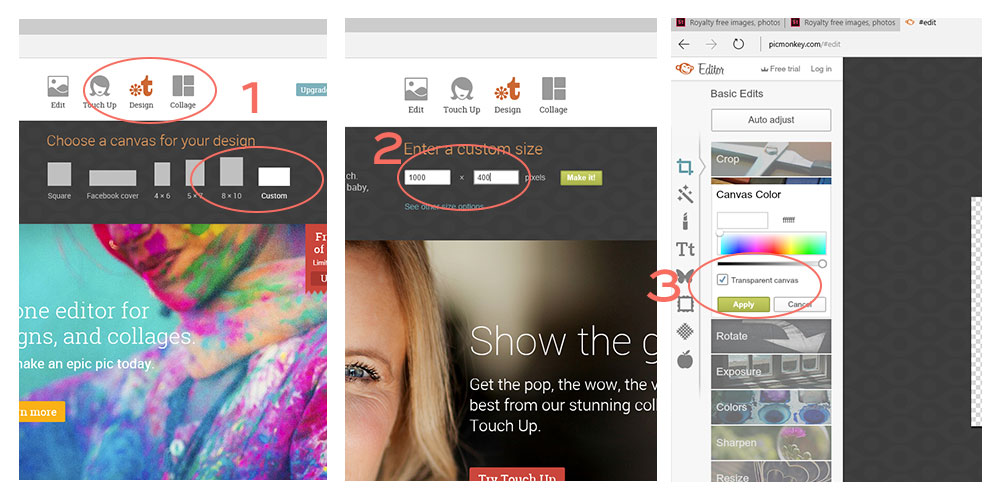
STEP 1: Hover over “Design” and select “Custom”
STEP 2: Enter in your logo/header size from your theme. We are using 1000×400 for the Hello Darling Theme. Then click “Make It”.
STEP 3: It is best to create a transparent logo/header. So over where it says “Color” check the box that says Transparent and hit “apply”.
Selecting the Logo/Header & Adjusting it
STEP 1: On the left hand side is the menu, select the “butterfly” icon. Then at the top of the new menu that comes up, choose “Your Own” and locate your logo file on the computer. It is best to use the .PNG format of your logo.
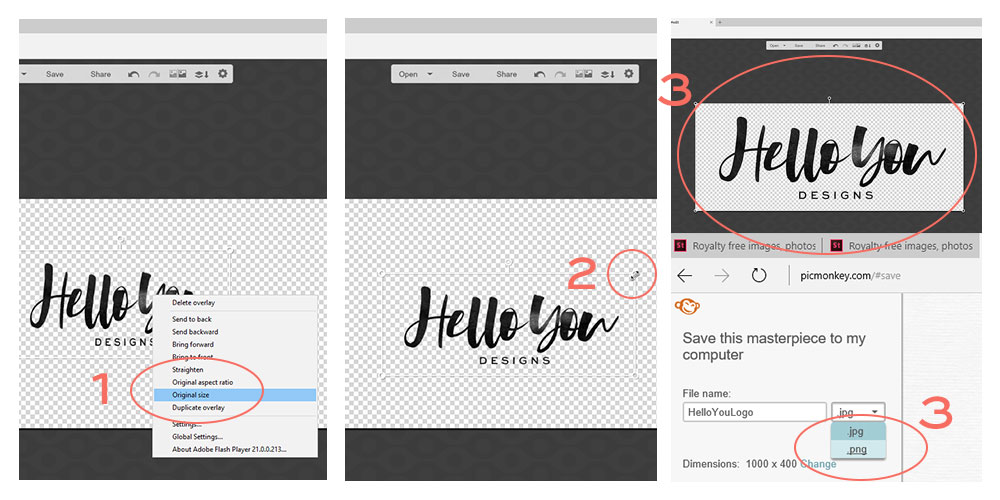
STEP 2: If your logo is huge it will be placed on the canvas and shrunk down in size. If you know your logo isn’t that much larger than the canvas, you can right click on the logo and select “Original Size” then adjust from there. If it is a huge file, doing that will make it super hard to adjust and it is better to stretch it into place.
STEP 3: Stretching it into place. Click on the logo and select the corner. Then pull it and adjust it until it sits perfectly on that canvas. Once done your logo is ready to be saved. Be sure to save it as a .PNG file.
Load Your New Logo/Header
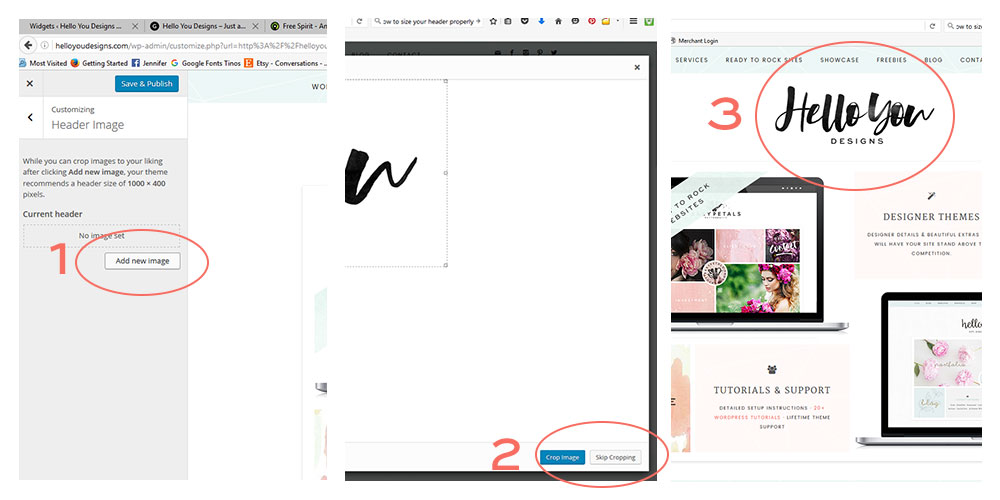
STEP 1: Follow the steps in the “Find Your Logo/Header Size” above and go back to the Customizer on your site. Once there select “add new image” and upload your new image. Then click “Select/Crop”
STEP 2: The canvas that your logo sits on is already the perfect size because we pre sized it. So no need to select “Crop Image”. Click on “Skip Cropping”.
STEP 3: A preview of how your new logo will look shows up. Hit Save and enjoy your properly sized logo/header on your gorgeous new site.
Troubleshooting Tips
Logo is still fuzzy
Logo looked great before saving and is fuzzy now?
Logo is rectangle sized, not square
Logo is tall and not rectangle in size
Why is my logo smaller than the size we created?
